

Key Takeaways
Why Paint Myths Are So Persistent - and So Costly
Interior painting looks straightforward - open a can, roll it on, done. That apparent simplicity is exactly why so much bad advice circulates unchallenged. A paint job that fails doesn't fail immediately; it peels, cracks, or fades over months, by which point most homeowners have forgotten which step they skipped. The result is repeat spending on a job that should have lasted a decade.
The myths below aren't fringe beliefs. They're repeated at hardware stores, passed down from well-meaning family members, and reinforced by marketing language on paint cans. Knowing which ones to reject - and why - is the difference between a finish that holds and one that doesn't. The same critical thinking applies to other home tasks: our guide on catching small problems before they become expensive repairs walks through early-warning signs that often show up on painted surfaces first.
Myth
You don't need primer if you're using a paint-and-primer-in-one product.
Fact
Paint-and-primer-in-one products offer convenience on already-painted, stable surfaces - but they don't replace a dedicated primer coat on new drywall, stained surfaces, or when making a dramatic color change.
Combination products are thicker than standard paint and contain some bonding agents, but they don't penetrate bare drywall the way a dedicated primer does. On raw drywall, skipping true primer leaves the porous paper facing to absorb your topcoat unevenly - producing a blotchy, flat appearance called flashing. On surfaces with water stains or smoke damage, a stain-blocking primer is essential to prevent bleed-through that no topcoat will fully hide. Reserve paint-and-primer combos for repaints where the surface is clean, sound, and not changing color dramatically.
Myth
One thick coat of paint is just as good as two thinner coats.
Fact
A single heavy coat takes longer to cure, sags more easily, and produces an uneven sheen. Two thinner coats create a more uniform, durable film.
Paint cures through solvent evaporation or oxidation. When a coat is applied too thickly, the outer surface skins over before the paint underneath has fully dried - trapping solvents and leading to slow curing, soft spots, and eventual peeling. Two coats applied at the recommended spread rate (usually 350-400 sq ft per gallon) bond more completely to the surface and to each other, producing the uniform film thickness that delivers the color richness and washability shown on the paint can.
Myth
Any weather is fine for indoor painting since you're not outside.
Fact
Interior temperature and humidity still directly affect how paint flows, bonds, and dries - even when weather seems irrelevant.
Most latex paints require temperatures between 50°F and 85°F and relative humidity below 50-60% for proper film formation. High humidity slows evaporation, extending dry times and making surfaces feel tacky for days. In very low humidity, water-based paint can dry too fast at the edges before leveling, leaving lap marks. If you're painting during humid summer months or in rooms prone to moisture, running a dehumidifier and ensuring adequate ventilation makes a measurable difference in the final result.
Myth
Cheap brushes and rollers won't affect the outcome if you're using good paint.
Fact
Low-quality applicators leave streaks, lint, and uneven texture that premium paint cannot overcome on its own.
A cheap foam roller or bargain brush sheds fibers, holds paint inconsistently, and doesn't distribute it evenly across the surface. Woven roller covers are rated by nap thickness - a nap that's too long for a smooth surface will leave stippled texture; too short on a textured wall and you'll miss the valleys. Higher-quality synthetic-bristle brushes hold more paint, release it more evenly, and allow for cleaner cut-ins without constant reloading. Tool quality is a false economy: spending a little more on applicators directly affects finish quality and painting speed.
Myth
Darker colors always require more coats than lighter ones.
Fact
With proper tinted primer, deep colors can achieve full, even coverage in two coats - sometimes fewer than certain lighter shades require.
The challenge with deep colors isn't opacity - it's achieving consistent hue depth without muddiness. Using a primer tinted by your paint supplier to a mid-tone of your chosen color means the topcoats don't have to fight a stark white base. Conversely, going from a dark color to a very light one is where extra coats (and a white-tinted primer) are genuinely necessary. Ask your supplier to tint the primer; this simple step saves a coat and reduces paint cost on dark-color projects.
Myth
You can paint right after patching holes or cracks with spackle or joint compound.
Fact
Patching compounds must be fully dry and spot-primed before painting - otherwise they'll show through as dull or sunken spots.
Even when spackle feels dry to the touch, it may still contain moisture internally - particularly for deeper fills. Painting over it immediately traps that moisture and causes the topcoat to crack or peel as it cures. More visibly, unprimed patches absorb paint differently than the surrounding wall, creating flashing: dull, slightly recessed halos visible under raking light. Always allow full drying per the product instructions, sand smooth, and apply a spot coat of primer before your finish paint. This is a small step that prevents highly visible imperfections.
Putting the Myths to Work: A Practical Pre-Paint Checklist
Understanding what's false is only useful if it changes what you do before you open a can. Use the following sequence to set your paint job up for a durable, professional-looking result:
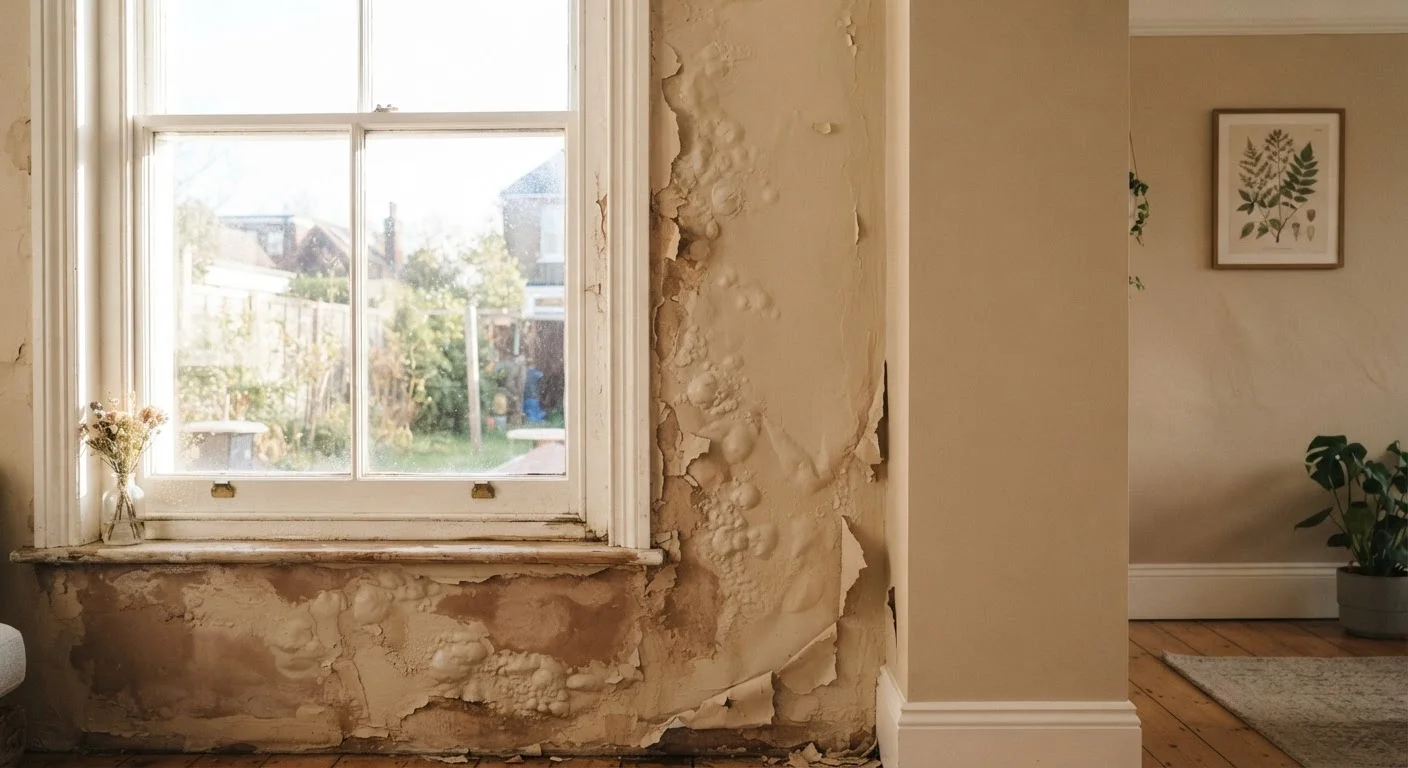
- Inspect the surface thoroughly. Look for moisture stains, mold, peeling, or cracks. Resolve the underlying cause of any moisture before painting. See the warning below.
- Clean walls with a damp sponge or TSP substitute. Grease and dust break adhesion. Don't skip this even if walls look clean.
- Repair holes and cracks, then let compound dry completely. Sand smooth, then spot-prime every patched area.
- Prime the full surface when painting new drywall, covering stains, or changing color dramatically. Use a tinted primer for deep colors.
- Check your environment. Aim for 50-85°F and below 60% relative humidity. Run a dehumidifier in humid months.
- Invest in quality applicators suited to your surface texture. Don't reuse degraded roller covers.
- Apply two coats at the recommended spread rate, allowing full dry time between coats per the product data sheet.
Don't Paint Over Moisture or Mold
Painting over damp walls or mold growth is a serious mistake that traps moisture and allows mold to spread behind the paint film. Identify and resolve the source of any moisture intrusion before painting. If mold covers a significant area, consult a qualified remediation professional rather than attempting to paint over it.
Taking shortcuts anywhere in this sequence is where money gets wasted. Just as knowing which DIY car maintenance tasks are worth doing yourself versus hiring a professional saves real money, painting smart means investing time in preparation rather than in repainting. And if you enjoy debunking home and garden folklore, our companion piece on gardening myths that waste time and money applies the same evidence-first approach to outdoor projects.
Surface Prep Determines the Outcome
No amount of expensive paint can compensate for a poorly prepared surface. Dust, grease, loose old paint, and unrepaired cracks will cause new paint to fail within months. Always clean, sand, and spot-prime before applying a finish coat - this single step separates lasting work from a costly redo.