

Key Takeaways
Why Substrate Is Everything
Tile is rigid. Subfloors flex. That fundamental conflict is at the heart of nearly every cracked tile or failed installation. When the surface beneath the tile moves - even slightly - the tile and mortar bond cannot absorb the stress, and something breaks.
The industry standard for subfloor deflection under tile is no more than L/360, meaning the floor should deflect no more than the span in inches divided by 360 under live load. For a 10-foot joist span, that's a maximum of one-third of an inch of flex. Exceeding this threshold virtually guarantees cracking over time, regardless of how well the tile itself is set.
Before purchasing a single tile, spend time assessing the subfloor. Walk the area and note any bounce, soft spots, or squeaks. Pull up existing flooring and check for water damage, delamination, or rot in the case of plywood. For concrete slabs, look for existing cracks and test for moisture vapor transmission - high vapor levels will destroy adhesive bonds and cause tiles to pop.
Never Tile Directly Over Standard Plywood
Exterior-grade or sanded plywood alone is not an acceptable substrate for floor tile, regardless of its thickness. Plywood swells and contracts with humidity changes in ways that will fracture the mortar bond and crack tiles within months. Always install an approved tile substrate - cement board or uncoupling membrane - over plywood subfloors before beginning any tile work.
Choosing the Right Substrate Material
Over a wood-frame subfloor, you have two well-established options: cementitious backer board (also called cement board or CBU) and uncoupling membrane systems.
Cement backer board is a rigid panel made from Portland cement and aggregate, fastened directly to the subfloor with screws and thin-set mortar beneath. It creates a stable, moisture-resistant platform. Its main limitation is that it does not address subfloor flex - it transmits movement from below directly to the tile above. It remains the standard choice in well-supported, properly stiffened subfloors.
Uncoupling membranes are a polyethylene matting system bonded to the subfloor with thin-set. The mat's grid structure physically decouples the tile layer from the subfloor, allowing minor differential movement without transmitting stress upward into the tile. This makes them especially well-suited for floors with marginal deflection or radiant heat systems.
On concrete, the substrate may be usable directly once it is flat (within 3/16" over a 10-foot span per ANSI standards), clean, and free of curing compounds. Use a self-leveling underlayment to address dips and high spots rather than trying to flatten them with thick mortar beds.
When assessing a plywood subfloor, apply firm downward pressure at multiple points across each joist bay. If you feel any give at all in the center of the bay, consider adding a layer of 1/4" or 3/8" plywood before backer board to increase overall rigidity.
Even minor subfloor flex that goes unnoticed underfoot can exceed L/360 under point loads like furniture legs, leading to localized tile cracking within the first year.
For large-format tiles (18" or larger), mix your thin-set slightly stiffer than the package's standard guidance - it should hold a peak without slumping. This prevents the tile from sinking unevenly as you adjust position.
Heavy, large tiles compress mortar ridges quickly. A stiffer mix gives you a longer working window to check for lippage and make corrections before the mortar sets.
Always do a full dry run of the first two rows from your center layout lines before mixing any mortar. Photograph the layout from a standing position to check for visual balance at doorways and focal walls.
Tile cuts that look acceptable at floor level can look awkward from a standing or doorway vantage point. Catching this before mortar is mixed saves the cost of wasted materials and reset time.
Layout Planning and Tile Spacing
A dry layout - setting tiles without mortar to plan the visual result - is not optional on any project larger than a backsplash. Find the room's visual center or the most prominent entry point and work outward. The goal is to avoid ending up with slivers of tile at focal walls. A 2-inch cut tile at a doorway is immediately noticeable; a 6-inch cut tile along the same wall reads as intentional.
Snap chalk lines to establish your working grid. In rectangular rooms, this typically means two perpendicular lines bisecting the space, adjusted so tile cuts at opposing walls are balanced.
Grout joint width serves functional as well as aesthetic purposes. Narrow joints (1/16" to 1/8") suit rectified tiles (precision-cut to consistent dimensions) and create a sleek, contemporary look. Wider joints (3/16" to 3/8") are appropriate for handmade, non-rectified, or natural stone tiles that vary slightly in size. Joints also accommodate minor dimensional inconsistency and give grout room to flex with building movement. Consult the tile manufacturer's specification sheet, as some tiles have a minimum recommended joint width.
Use plastic tile spacers consistently throughout the field. Remove them before the mortar sets fully - typically within 20-30 minutes of setting each tile.
Setting Tiles: Mortar, Coverage, and Technique
Thin-set mortar is the standard adhesive for floor tile. Match the mortar type to the tile and substrate: standard gray thin-set for most ceramic tiles on cement board; white thin-set under light-colored or translucent stone; large-and-heavy-tile (LHT) mortar for tiles exceeding 15 inches on any side or heavier natural stone.
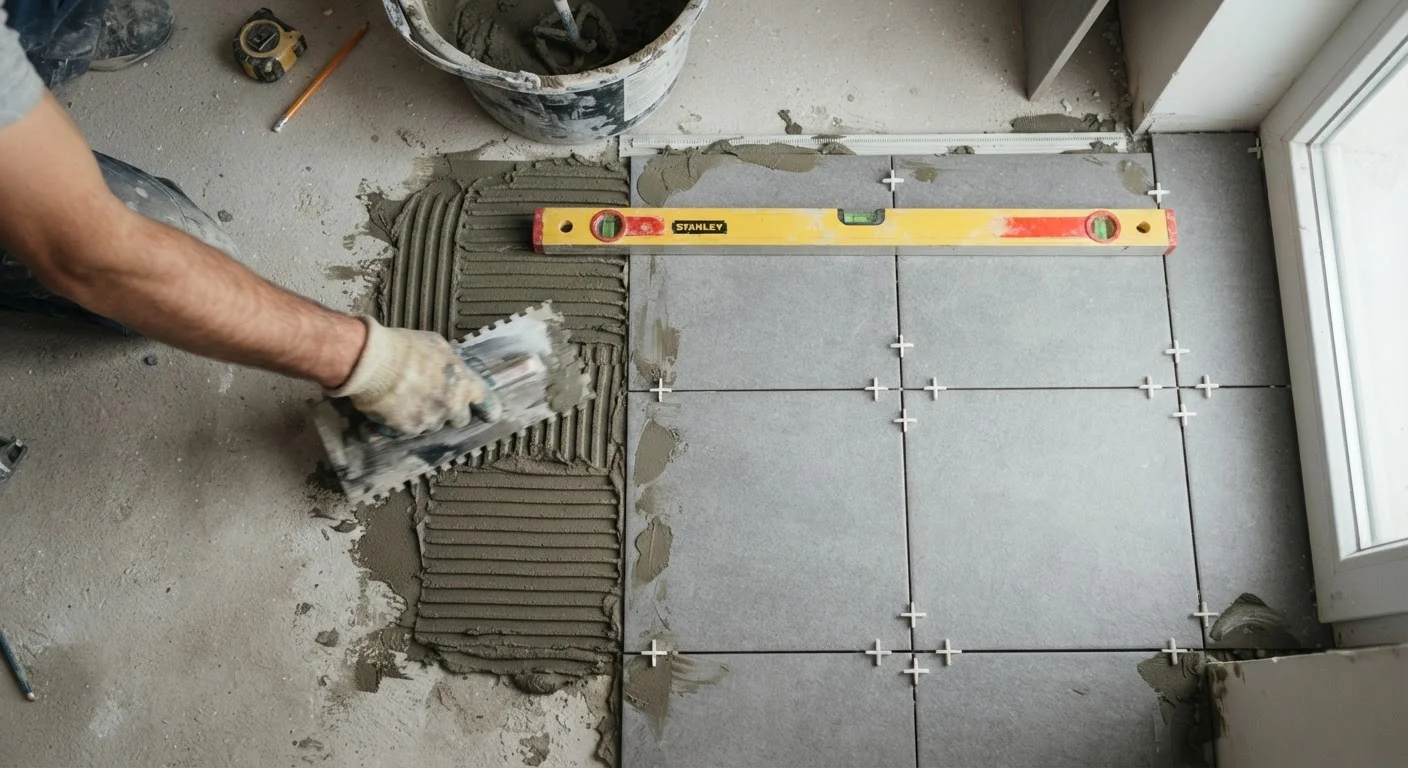
Apply mortar to the substrate with a notched trowel. Trowel size determines ridge height and ultimately mortar coverage. Larger tiles require larger notches - a common guideline is a 1/2" x 1/2" square-notch trowel for tiles 12" or larger. Comb the mortar in one direction to help release air when the tile is pressed in.
For tiles larger than 12 inches, back-buttering is strongly recommended: apply a skim coat of thin-set to the back of the tile before setting it. This ensures full contact and eliminates hollow spots that lead to cracking under point loads. The Tile Council of North America (TCNA) recommends a minimum of 80% mortar coverage in dry areas and 95% in wet areas or exterior applications.
Press each tile firmly into the mortar and give it a slight twist to collapse the ridges. Use a rubber mallet and beating block to seat larger tiles evenly. Check for lippage (one tile edge higher than the adjacent tile) frequently with a straightedge - ANSI A108 allows no more than 1/32" lippage for grout joints under 1/16" wide.
The Mistakes That Crack Tiles
Understanding failure modes makes prevention straightforward. The most common causes of cracked tiles after installation include:
- Insufficient subfloor stiffness: As described above, exceeding L/360 deflection is a primary culprit. Adding blocking between joists or sistering joists is often necessary before tiling a wood-frame floor.
- Hollow spots beneath tiles: Skipping back-buttering or using too small a trowel leaves air pockets under tiles. When weight is applied, the tile flexes slightly into the void and cracks at the unsupported area.
- Tiling over green concrete: New concrete should cure for a minimum of 28 days before tile is applied. Moisture movement during curing causes bond failure.
- No allowance for movement: Without expansion joints, thermal and structural building movement has nowhere to go except through the tile or grout. See the guide to recurring grout failures for a deeper look at how movement stress damages finished tile work.
- Mixing mortar too wet: Watery thin-set has lower bond strength and shrinks more as it cures, reducing coverage and increasing the risk of tile movement.
Expansion Joints and Long-Term Movement
Tile installations are not static. Buildings shift seasonally, temperature changes cause materials to expand and contract, and structural loads constantly vary. Expansion joints - gaps filled with flexible caulk rather than rigid grout - provide a controlled place for this movement to occur without damaging tiles.
The TCNA recommends expansion joints at all changes in plane (floor-to-wall transitions), at structural joints in the building, and within the tile field at intervals no greater than 20-25 feet in both directions for interior installations. In practice, this means every perimeter joint where the tile meets a wall, cabinet, or threshold should be caulked with a flexible, color-matched sealant rather than filled with grout.
Choose a siliconized latex or 100% silicone caulk in a color that matches your grout. Silicone offers the most long-term flexibility but can be harder to color-match and apply cleanly. Siliconized latex caulk is easier to work with and suffices for most interior residential applications.
Proper expansion joint placement is one of the most overlooked details in DIY tile work - and its absence is one of the clearest indicators that a floor will need remediation within a few years. Taking the time to plan and execute these joints correctly extends the serviceable life of a tile floor dramatically.